I have lived in my house for almost a year now, and I have no art up on my walls. None. Honestly, it's a little pathetic.
My living room wall is pretty large. We're talking 10 feet high by maybe 18 feet long? The only thing on that wall is an air vent, and we spend all our time in the living room! We should have something beautiful and inspiring on our wall!
Cue to my idea!
I wanted to put a wall decal up! I thought about how I had seen all those modern living rooms in photos with birch tree decals lining the length of the wall behind those crisp clean couches. I knew that I definitely wanted a tree decal, but I quickly realized those modern birch trees don't work for us. We're crafty and crazy and awesome, and we need a tree that can portray that.
I started with Pinterest, then moved to Etsy, then google image search, then I asked friends to help me find trees. I found lots of really nice decals, but found out fast, that to get a decal that will fit my wall, I was going to be paying upwards for 150 or 200 dollars. I could NOT swallow that price tag, not matter how beautiful the tree was!
I decided to make my own. I found a website that sells the vinyl by the yard in rolls for only 4.00 a yard!
http://www.hhsignsupply.com/productcart/pc/24-Inch-Oracal-631-Wall-Craft-Vinyl-c541.htm
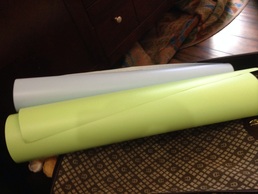
I chose 1 yard of geyser blue for birds, 3 yards brown for the tree, 2 yards key lime for accent leaves, and 2 yards of olive for the bulk of my leaves. My total AFTER shipping was under 50 bucks! If this was going to work, it was going to save me LOTS of money!
As SOON as my package arrived, I got to work. Here are my instructions. I hope someone else makes the attempt as well, and shows me how their's turned out!
As SOON as my package arrived, I got to work. Here are my instructions. I hope someone else makes the attempt as well, and shows me how their's turned out!
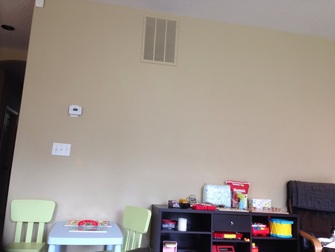
Here is my big empty wall before I started.
Before I began, I took a damp sponge and cleaned off any debris from the wall and vent, to be sure I had a clean area so the vinyl would stick.
Make sure before you begin, to have a good large roll of painters tape, and some really good scissors! (And a LOT of time!)
Before I began, I took a damp sponge and cleaned off any debris from the wall and vent, to be sure I had a clean area so the vinyl would stick.
Make sure before you begin, to have a good large roll of painters tape, and some really good scissors! (And a LOT of time!)
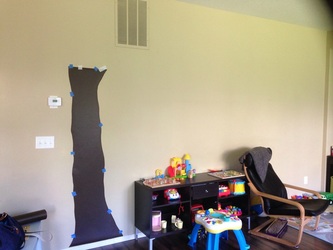
So first off, I measured about how tall I wanted the trunk of the tree to reach. This is about 8 feet tall and a little over a foot wide. I cut 8 feet of vinyl out, taped it on the wall, drew my tree trunk shape with a pen, and then cut it out with scissors. This is by far the biggest piece, and the part I found to be easiest. Once I cut it out, I taped it back on the wall to get started on the branches.
The branches is where it got tricky. I knew I had to start with the largest "trunk" branches. The "fat" branches, as you will. They were fairly large pieces that I freehand drew, cut, and taped up onto the wall. There were lots of overlapping pieces, but I wasn't concerned about that yet. I needed to get the basic shape down. As the branches...branched out...;) I taped smaller vinyl pieces to the wall and followed their general shape to cut out and tape on a branch shape.

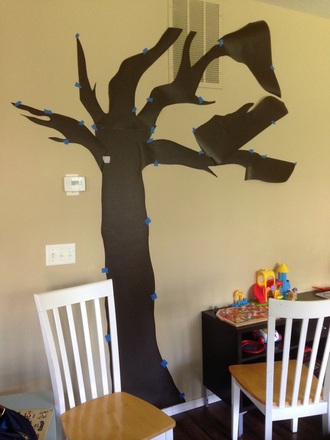
As I went on, I added tiny taped little branches, and longer branches. I wanted a tree that looked like the wind was blowing it, so that I could have leaves blowing across the wall, filling the large space.
This was absolutely the hardest part for me. Trying to make vinyl paper look like a tree using tape and scissors is hard for me. I KNEW it would look better with the leaves on, but it took a bit for me to not give up and just push through.
Don't get discouraged here. I PROMISE, it will look better with leaves!
Here was the scary part. I had to take the tape off, and start sticking the decal down, once I was happy with the shape.
I started with the bottom of the trunk to be sure it was even with my baseboard. If you've ever worked with contact sticky paper, this is basically the same thing (just not as frustrating as contact paper!) Little by little, I got everything stuck on there without tape holding it up.
Where large pieces overlapped, I trimmed them down, but I wasn't too concerned about a little overlap. It looked pretty damn good now!
I cut some strips of olive vinyl, and cut some large leaf shapes out. My idea was to have large olive leaves at the end of each large branch, and light green leaves to fill in the rest. I used tape to stick the leaves on, so I could move them if I needed to.
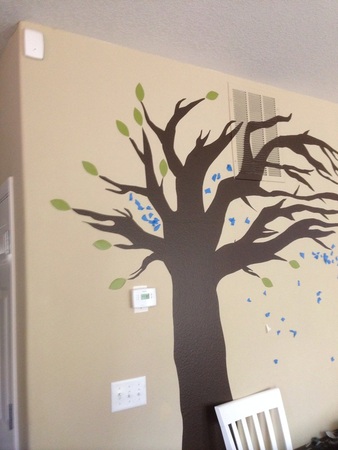
When I started taping on the large key lime leaves, I hated them. You can see in the photo here, I moved all the large ones down away from he branches onto the trunk until I could figure out what to do with them.
I cut smaller key lime leaves and smaller olive leaves, and used them to fill in the area instead.
I cut smaller key lime leaves and smaller olive leaves, and used them to fill in the area instead.
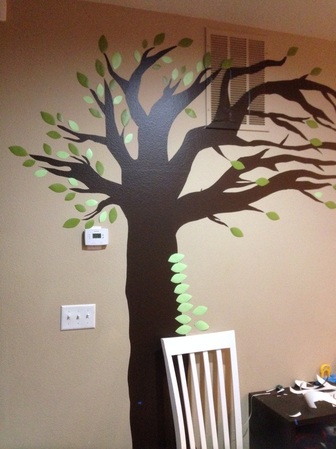
As I was happy with the leaves, I started taking the tape off and actually sticking the vinyl onto the wall. You CAN take it back off if you need to, and re stick it, but you lose the integrity of the stickyness, so I tried to avoid this at all costs.
It took quite a few leaves to really fill in my tree. I had to cut way more smaller leaves than I had anticipated.
Finally, I started making them look like they were blowing off of the tree, by placing them to the right, sporadicly.
It took quite a few leaves to really fill in my tree. I had to cut way more smaller leaves than I had anticipated.
Finally, I started making them look like they were blowing off of the tree, by placing them to the right, sporadicly.
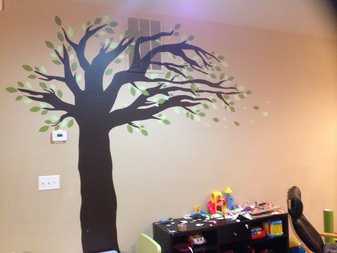
When I had stuck all my leaves on the wall, and was happy with that, I cut out some bird shapes using my geyser blue. I decided on 4 birds. 3 sat in the tree and one is flying towards the tree in the leaves.
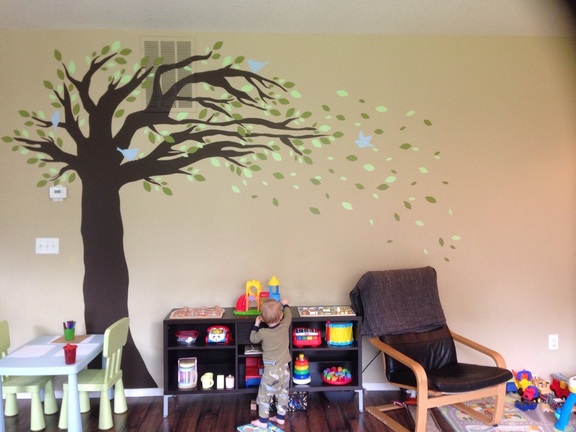
I had a WHOLE lot of paper to clean up, but once I got it all picked up, I was really really happy with the result. I took some short breaks, but I basically started this around 3pm, and finished about midnight.
I ordered a quote that will be going on the wall to the right of the leaves. Once I place that, I will stick some more leaves around it, just to tie it together. The quote will read "The best things in life are the people we love, the places we've been...and the memories we've made along the way."
I'm psyched. I saved tons of money and have a lot of pride in my work that I get to see "hanging" in my living room all the time.
What do you guys think? Ready to give it a try? Any questions?
 RSS Feed
